How to Use the Grid Method for Drawing
You will need:
- Paper
- A printed out image (see below)
- Pencils
- Ruler
- Eraser
- If you want to paint: Watercolour, Paintbrushes, Palette and Water
Picking and printing your image


Simply pick an image that you like. We thought that these images were beautiful, and suited our video, as we were filming in a nature reserve. These images are by Marc Grove, and can be found, amongst many other amazing pictures by clicking here.
You don’t have to do an animal though, you can pick any image that suits your taste. Alternatively, you can pick an image that you already have a hard copy of. This way you won’t have to do any printing.
When you have chosen your image, print it out, ensuring a little space around the sides for labelling.

Drawing your grid on the image

Now that you’ve got your image, you may begin by drawing your grid.
Depending on how detailed your image is, pick how big your blocks will be. Choose between 1 cm, 2 cm and 3 cm. We did 2 cm, but it’s entirely up to you.
Now, make your marks along the sides with your chosen length.
VERY IMPORTANT: To ensure that your lines are straight, you have to start in the same place on either side. E.g. If you start marking your horizontal lines from the top left hand corner, you have to start from the top right hand corner. Similarly, doing the vertical lines; if you start from the top left hand corner, you have to start from the bottom left hand corner.
Upon completing your marks, simply line them up with your ruler and and join them up, forming a grid. These lines can be hard, but when you draw the grid on your paper, it has to be soft so that it can be easily erased.
Finally, label the grid, ABC… along the bottom, and 123… up one of the sides.
There you have your grid!
Drawing the grid on your paper

First, decide on the placement of the image on your paper. Is it going to take up the entire page or only a small part.
Now, it gets a little mathematical. Luckily, we have a formula for you that you can use pretty easily.
[(Length of paper) x (Block length)] ÷ (length of image)
You may want to round your measurements for [1] and [3] off to the nearest ten. This will make your second grid a whole lot easier to draw.
- Measure the length (or width) of the area on the paper that you want the drawing to take up. Insert this into the first part of the formula.
- Now, insert the length of one block on your grid over the image into the second part of the formula. (Remember, ours was 2 cm)
- Lastly, insert the length (or width if your used that for [1]) of your image into the last part of the formula.
- Work it out, first multiply the first to parts [1 & 2] together, then dividing that by the last part [3]. Your answer will be the block length on your second grid.
E.g. (20 x 2) ÷ 40 = 4cm
Now you know what your block length on your paper is, you can start drawing the grid. Starting on the top of your paper ( wherever you wanted your drawing to start), make marks exactly how you did on your image. Because your blocks are square your can use the same answer [4 cm] for all sides, so you only have to do the maths once.
REMEMBER: To ensure that your lines are straight, you have to start in the same place on either side. E.g. If you start marking your horizontal lines from the top left hand corner, you have to start from the top right hand corner. Similarly, doing the vertical marks; if you start from the top left hand corner, you have to start from the bottom left hand corner.
To know how many marks you have to make, simply count the number of block that you made on your image, and make the same amount on your paper.
Now, line up the marks with your ruler, and join them up, forming a grid. Make sure that they’re ghost lines (very, very soft) otherwise you’re going to have big trouble erasing them later.
Lastly, label the grid exactly the same as in your image, ABC… along the bottom, and 123… up one of the sides.
Starting your drawing

Turn everything upside down. What?! Why?!
Trust us, just do it. The grid is a way of focusing on the lines of the image, rather than the image as a whole. Turning your image and paper around enhances this effect, so that you truly are just looking at the lines, not the whole daunting image.
Pick a place to start. E.g. If you pick E5 on your image , start on E5 on your paper, carefully copying the lines that you see in E5 on the image. See the two grids in relation to each other, looking carefully at where lines of the [animal] cross the grid-lines. For example, one could draw the line by seeing that it enters through the left side of E5 halfway up, and leaves through the bottom of E5, a quarter way through. Also make sure that your get all the bumps and curves of the lines in.
Now continue for the rest of the blocks…you’ve got this! This is a great way of making sure that you’re copying the image correctly and in the right proportions.
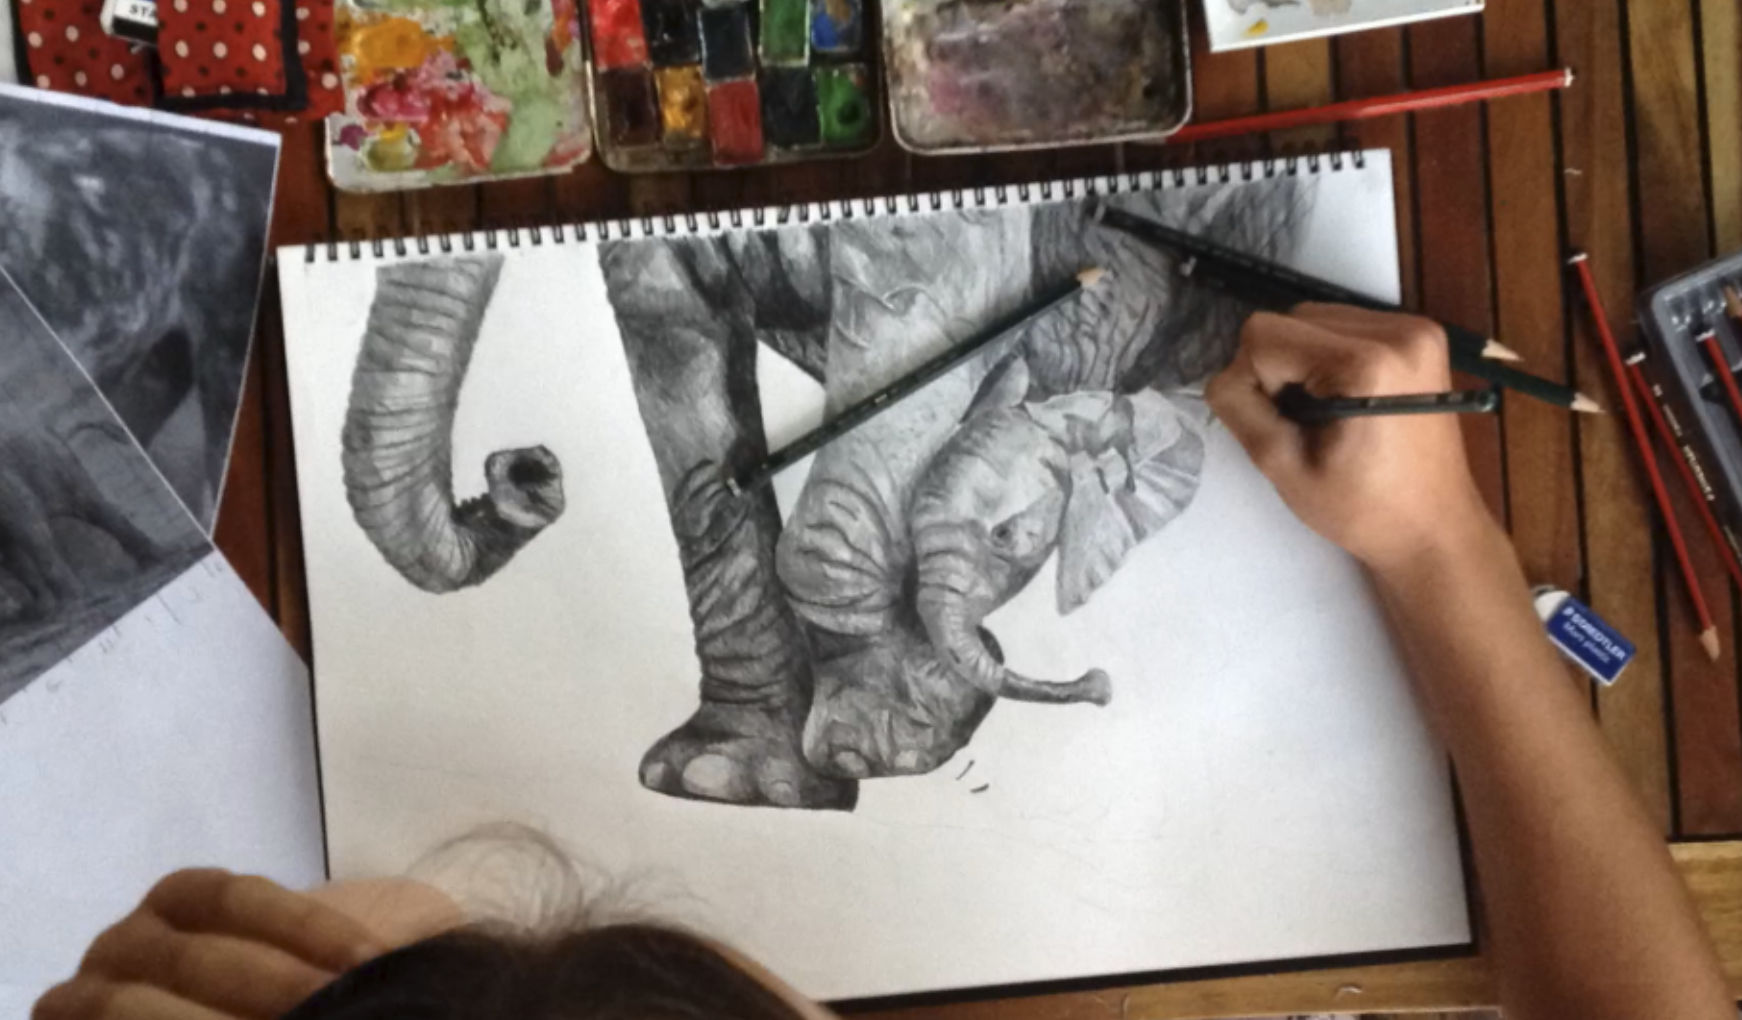
Shading & Painting

Now that you’ve done the outlines, it’s time to add a little something special. First, however, you have to erase your grid lines. This should be easy, as you drew them very, very softly. Make sure, though, that you don’t erase your outline.
Yes, you may turn your things the right way around now!
Choose which medium you would like to work in. If it’s shading, do your thing, try making sure that you have a choice of pencils with different shades (if you just use HB your tonal variation won’t be very wide). If you prefer to paint, get your painting things ready, and start painting!
Have fun!


Leave a Reply